Tuesday, 30 August 2011

One Pot no Waste!

In our family because we meal plan, we buy exactly what we need for the meals for the following week.  This means that we rarely have to pop out to shops at the last minute and that my husband and I don’t have to think after a long day at work “gee what are we going to have to dinner tonight”.  No Stress!!  
 
It also has the added benefit that very little food that goes to waste.   We plan it so that we get the most out of each ingredient that we buy.  For example if we have to buy a whole celery we will make sure it is incorporated into other recipes for the week so none is wasted.


This brings me to a fabulous recipe we cooked recently; 

Lentil and Ham Hock Soup.

So simple, 1 Ham Hock (we bought a smoked one from our favourite deli) bring it to the boil in enough water to cover and simmer for an 1-hour.  Remove it (for later) and strain the stock left also for later use.


Then slice and dice 2 onions, 2 Carrots, 1 Leek and 2 Celery Stalks and cook with a spot of oil for approximately 5 minutes than add 2 cloves of garlic (crushed) the recipe we used suggested one small red chilli (but we didn’t because of Mr 4 year old) and cook for another minute. 

Add the reserved stock, bring to the boil again and add a cup of Green Lentils.  Simmer for approximately 35 minutes until lentils are cooked.


The last thing to do is add the diced meat from the previously boiled Ham Hock (removing all skin, gristle and sinew).


This soup is delicious, easy to make, cheap and great for the whole family.    

The best thing about it nothing goes to waste.  

Wednesday, 24 August 2011

Pizza the OMG way !!

When I first started this blog I mentioned that I would be road testing new recipes that I had never cooked before. These recipes would be coming from my ever expanding collection of cookbooks.


Friends of ours have a copy of Jane Kennedy’ s OMG I can eat that? Indulgent food minus the boombah. .   I was lucky enough to come across a copy for $10.  The book focuses on everyday meals with healthier options instead of the usual potato mash, pastry etc.   Our friends had made her 4 hour slow – cooked garlicky lamb served with her roasted carrots with feta and said it was delicious.

So far we have cooked 3 recipes from it,  $10 well spent in my opinion, as the all 3 have been very nice.

Which brings me to this months recipe.  Pizza made from grated Zucchini as the base.  That’s right, no wheat in sight.


The base is very easy to prepare, one large grated zucchini (peeled) 100g of grated mozzarella cheese and one egg.    Mixed together and pour onto a tray lined with baking paper.  Cook in a 190o Oven for 15 minutes or until browned. 


  That’s it.


Once the base is cooked turn up the oven to 220o.  Then you are free to cover the base with whatever you like and pop it back in the oven until the cheese is bubbling and brown.


Each pizza serves 2  (we made 2 pizzas) happily fed the 3 of us.   Spreading passata on the base we topped one pizza with fresh pineapple, prosciutto and rocket (once cooked).  The second with pepperoni, olives, char grilled capsicum and both pizzas finished off with mozzarella cheese.


This healthy take on the traditional is not going to replace the flour made pizza bases that we love, but is was nice for a change. 

Saturday, 13 August 2011

Memories

Almost every Australian in the last 30 years has grown up,  with their Mum’s making  them a Birthday cake from the Australian Women’s Weekly Birthday Cake book.   I remember as a child Mum making my sister and I our birthday cakes that we requested from it.


A friend of mine offered and made our son the “Choo- Choo Train” last year from an original copy she had from her mother.   Our Son just loved the cake and couldn’t stop talking about how wonderful it was.  


After flicking through the book he decided that for his next birthday he wanted “Robert the Robot”.   And for the following 12 months at every opportunity he mentioned that he was having a “Robot Cake”


As luck would have it,  a special collectors edition was released this year and  I bought  a copy.  So for our sons 4th Birthday my husband and I made “Robert the Robot” for him. 


It really wasn’t as difficult as we anticipated and the finished result was amazing.


We had one small disaster because I had greased the pans, but I didn’t line them with baking paper.  


We made a second batch of cakes that came out of the pans lined with baking paper without a problem.

We also cheated slightly, because we didn’t make the suggested Vienna Cream icing.  We purchased ready-made icing and coloured it blue.


Special mention also goes out to our friend "TD" who recently made the “Candy Castle” for her daughter.

It looked fabulous and was a massive hit with the Kids and (of course) the Adults 

Saturday, 6 August 2011

Back on board

What a month we have had.   We've moved house, been sick and we are right in the middle of birthday season.  With my Husband just celebrating his 40th our son is turning 4 this coming Tuesday and a number of friends and family celebrating birthdays in the last month as well. 

Happy Birthday Everyone !

So I have been very slack on updating the blog.   Stay tuned …… the next instalment will be up soon. 

Wednesday, 6 July 2011

Green Curry Paste

My husband and I love Asian cuisine and the Asian region.  We have travelled, eaten and even lived in various countries in the past. 


Inspired by our love of Thailand and Thai food we have been experimenting making curry pastes from scratch. Previously we assumed that they were difficult to make and that using a prepared paste out of jar was simpler to cook with and still authentic.   However we were mistaken, they are so simple.   We happen to live in an area of Melbourne where buying everything we need to make our Asian favourites is very accessible. 

So to make a Thai Green Curry Paste we purchased our lemon grass, chillies, eschalots, garlic cloves, fresh ginger or Galangal (if you can get it), a bunch fresh coriander (including roots) and something that we love and our friends grow and kindly let us steal from there tree are kaffir lime leaves (which we keep in the freezer until we need them).  Kaffir lime leaves add such a zesty and a real Thai favor.
To make the paste we placed all ingredients in the blender with a little oil and there you have it, an authentic, beautifully smelling and vivid green curry paste.    


Saturday, 25 June 2011

Rhubarb Rhubarb

The other night on the way home from work, my husband called and asked me to stop at our local Fruit and Veg shop to pick up some last minute beans to go with dinner. On my way to the pay for my beans I spotted in season beautifully crimson Rhubarb and figured I would try and make something with it.    Once I got home, gave the beans to my husband I went on a mission to deicide what to do with it.  There are millions of recipes for Rhubarb and Apple Pies or Rhubarb crumbles, but we didn’t feel like making a dessert with it.   

To my surprise we found a Jam recipe on a website that we visit frequently www.taste.com.au Our family love jam and I tried cooking in the past without much success, I always end up with a toffee like disaster. 

But we gave it a go and we couldn’t believe how easy it was to prepare and make and so delicious.   

500g of trimmed rhubarb, washed, coarsely chopped. 
500g caster sugar
1/4 cup fresh lemon juice
1 tsp vanilla essence

We combined all ingredients in a bowl, covered it and left it in the fridge overnight. 

The next morning we popped it into a saucepan on a medium high heat, brought it to the boil and stirred it for 20 – 30 minutes until it was thick and jelly like.  We used a tip on the website to know when it was ready. 

“ To test if the jam is ready, place 1 teaspoon of the jam on a chilled saucer and place in the freezer for 1-2 minutes or until cooled to room temperature. Lightly push the jam with your finger. If the surface wrinkles, it's ready”

We got a whole medium jar of jam.  We made a batch of Stephanie Alexander’s basic scones and went to the park for morning tea to enjoy it. 

Saturday, 18 June 2011

The 1st Time.

Apart from having monthly subscriptions to Australian Good Food magazine Australian Good Taste to assist us with our meal planning I also have a small but expanding cookbook collection.   I often receive them as gifts and love to sit down on the couch to read them and gather inspiration and think ahead to what I would love to cook.   


Last Christmas my in-laws gave me a copy of the ‘Barefoot Contessa’ back to basics by American Ina Garten.  I must admit that I have been scared to cook from it.  Ina uses some produce and products that I not that familiar with and uses imperial measurements.   But I loved how she uses good quality ingredients and cooks beautiful simple food.

So I set myself a challenge every month I am going to cook a recipe from one of my cookbooks that I have never cooked before.  And you never know I could discover our new family favorite dish in the process.

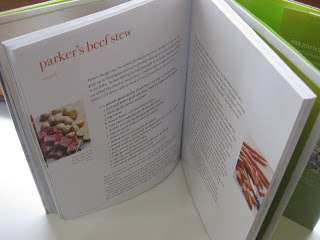
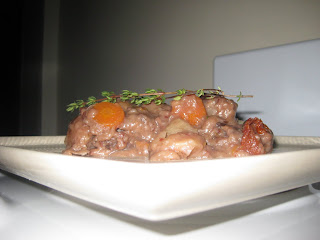
The other night we cooked Parkers Stew from Ina’s lovely book.  We varied it slightly as we didn’t have a bottle of Cab Sav and I really really dislike green peas, so no peas for us.   We marinated a kilo of Chuck Steak with a whole 750ml bottle of Merlo with 3 Bay leaves from the garden and 3 cloves of garlic overnight.

Next day strained liquid, picked out the garlic and reserved it and the liquid it to cook with later on.  We got out a large casserole pot borrowed 200g of Bacon (removed from pot) and than the beef that had been lightly coated with a flour/salt and pepper mix.

We set the browned meat aside and threw in 2 diced onions and chopped the reserved garlic and 3 carrots and 6 baby chat potatoes and stir it all around a bit. 

The best bit was to add 2 cups of the reserved liquid, about 2 cups of beef stock, your browned beef and bacon, a small bunch of fresh rosemary, 2 tablespoons of Worcestershire Sauce and ½ a cup of Sun dried tomatoes (drained, sliced and added to the vegetables) and give it a stir and pop it in the oven on 160 - 180 degree's for 2 hours.   

Two hours later we had a beautiful smelling, meat falling apart stew to eat.    This recipe make a ton, so we more had than enough to eat the next day (we thought it actually tasted better) or you could even freeze the rest for another meal later down the track. 

All in all not a bad recipe for these cold winter months. 

Sunday, 12 June 2011

Breakfast

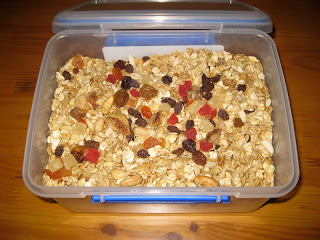
For years I would never eat breakfast, I would have a latte and a cigarette on the run.  However, being older and wiser and (hurrah) now a non-smoker it is something I now eat regularly.   This is mainly due to homemade muesli that my husband makes every week.  It probably costs a little more than buying a supermarket brand, but it’s not full of sultanas and the wonderful thing is that we can vary it weekly if we like.  

Here is the base recipe but you can change it every week depending what you have the pantry or what dried fruits, nuts or seeds are on special.

Our home made toasted muesli

Ingredients

1/3 Vegetable oil (we use Ricebran Oil)
¾ Cup of Honey (We use Aldi’s organic honey)
750g bag of Rolled Oats
2 hand fulls seeds (Pepitas, sunflower seeds or unsalted pumpkin seeds)
250g of mixed dried fruit
(We love a mix that includes figs, paw paw and dates.  But use what ever you want.  My mum puts dried Mango in hers).
1 Handful of Nuts (Raw and Unsalted)

Method

Preheat oven to 180 degrees

Mix oil and honey together and then add, oats, seeds and nuts together in a bowl to make sure everything is coated in oil and honey mixture.  

Spread the mixture evenly in a baking dish and bake in the oven for 30 minutes until it is lightly browned; occasionally mix with a fork to ensure the mix bakes evenly.

Once toasted, leave to cool.   Then add dried fruit, place it in an airtight container and shake to mix.